Old Farmhouse IKEA Kitchen Remodel: The Result
How the IKEA BODBYN Cabinets Transformed this 1870s Farmhouse’s Kitchen
In this article:
- Installation of Thomas’s new IKEA cabinets.
- Design adjustments are a fact of life—or at least renovations.
- Tips and tricks for maximizing storage.
- Countertop templating: What could go wrong?
- Final touches.
Designing a kitchen remodel in an old home can present unique design challenges. Thomas decided to completely overhaul his tiny, outdated farmhouse kitchen. Realtor and former IKEA project manager Baltimore Betsy saved her client thousands by recommending an IKEA kitchen designed by Inspired Kitchen Design.
The first article of this series detailed the IKEA shopping experience and professional design process.
In the second article of the series, we discussed demolition and the advantages of an IKEA kitchen when renovating an older home.
In the final article of this series, we’ll look at how all of his plans came together to create the finished product.
Designing an IKEA Kitchen to Fit your Current Square Footage
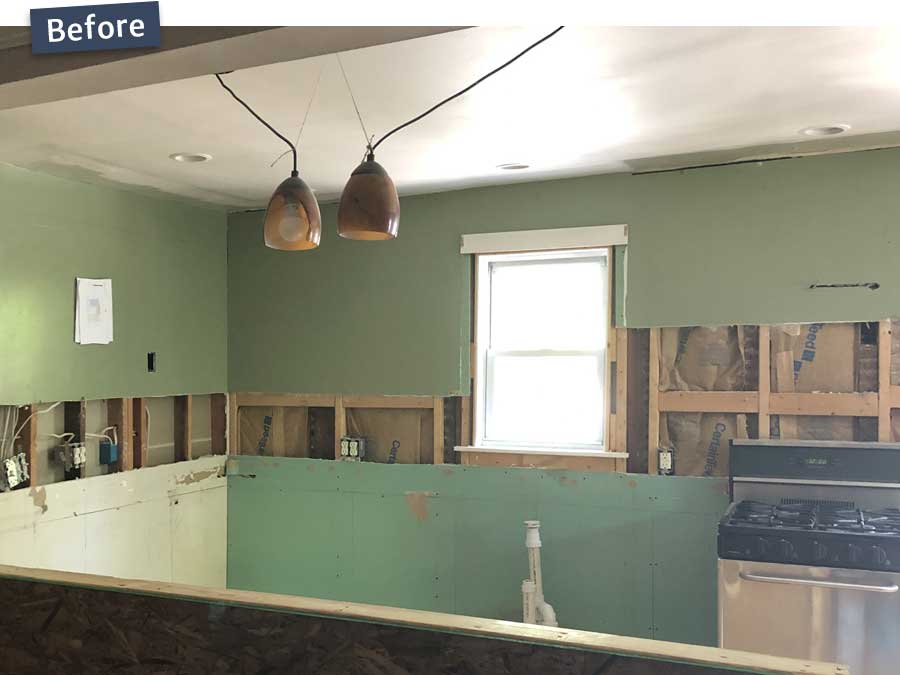
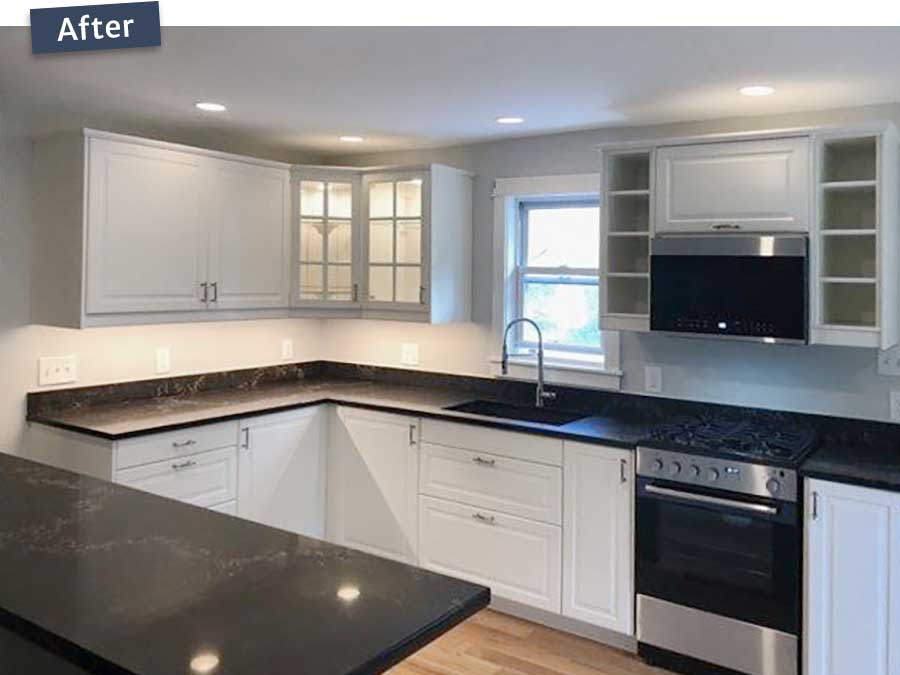
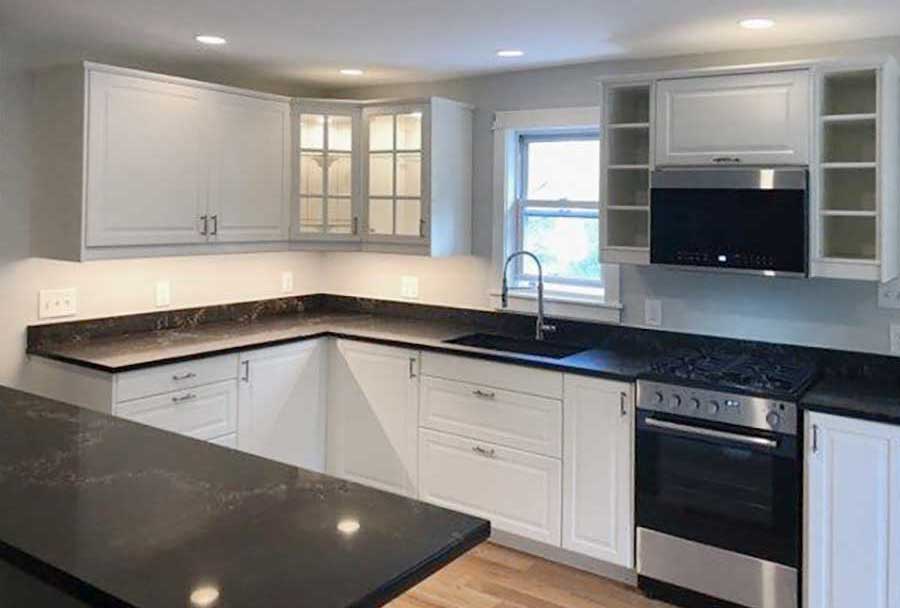
Thomas’s contractor spent the last month repairing sheetrock, painting walls, and organizing the plumbing, electric, and cabinet installation for this IKEA kitchen. The difference these modern white cabinets have made to the space is stark.
The light gray wall paint and new white BODBYN cabinets reflect the updated lighting, opening the space instead of hiding it in shadow. The black quartz countertop contrasts and ties in with the new black & stainless-steel appliances. The previous beige, green, and wood aesthetic made the kitchen feel dated and cave-like.
Making Adjustments During the IKEA Kitchen Renovation Process
A good rule of thumb is to set aside ten percent of your renovation budget so that your design and wallet don’t suffer when something unexpected comes up. We say when something unexpected happens because it’s almost guaranteed—especially when renovating an older home.
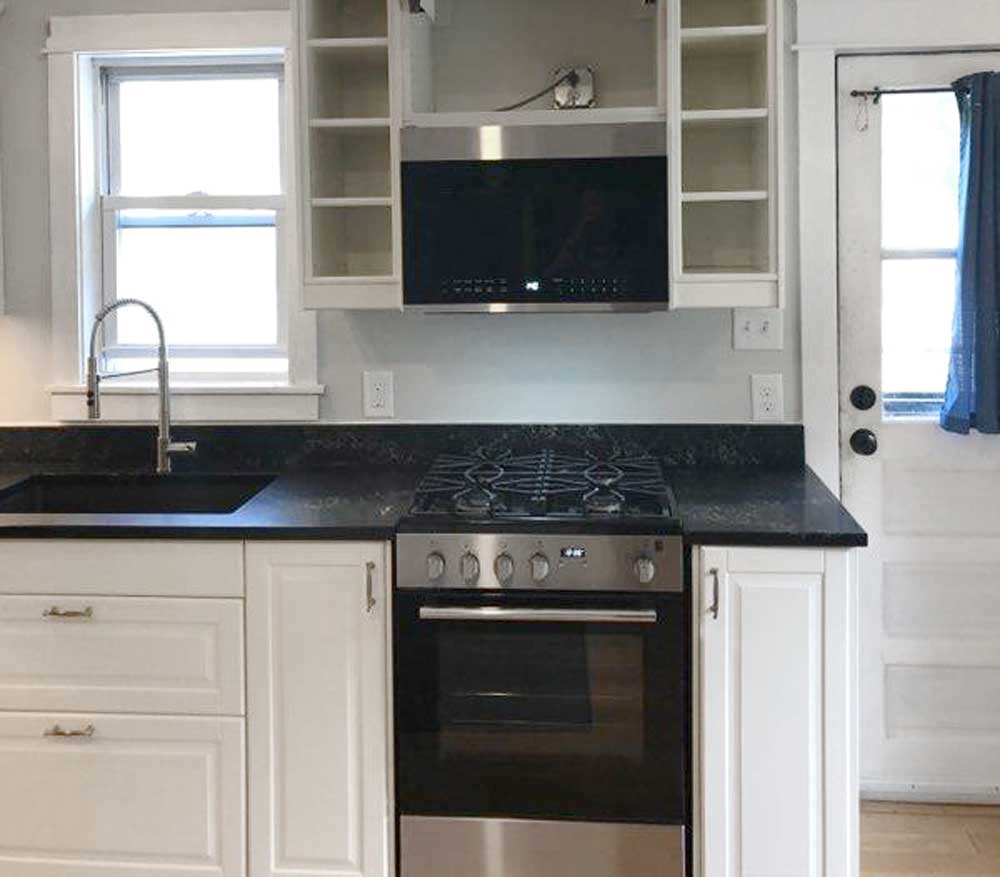
In Thomas’s case, this occurred when the twelve-year-old kitchen range broke. Thomas had enough to buy a new range, but the decision affected the design. The new, flat stove top would require connecting the counter and backsplash and changing the intended counter template.
Overall, this choice improved the design, but it wasn’t planned.
How to Maximize Storage in a Small IKEA Kitchen
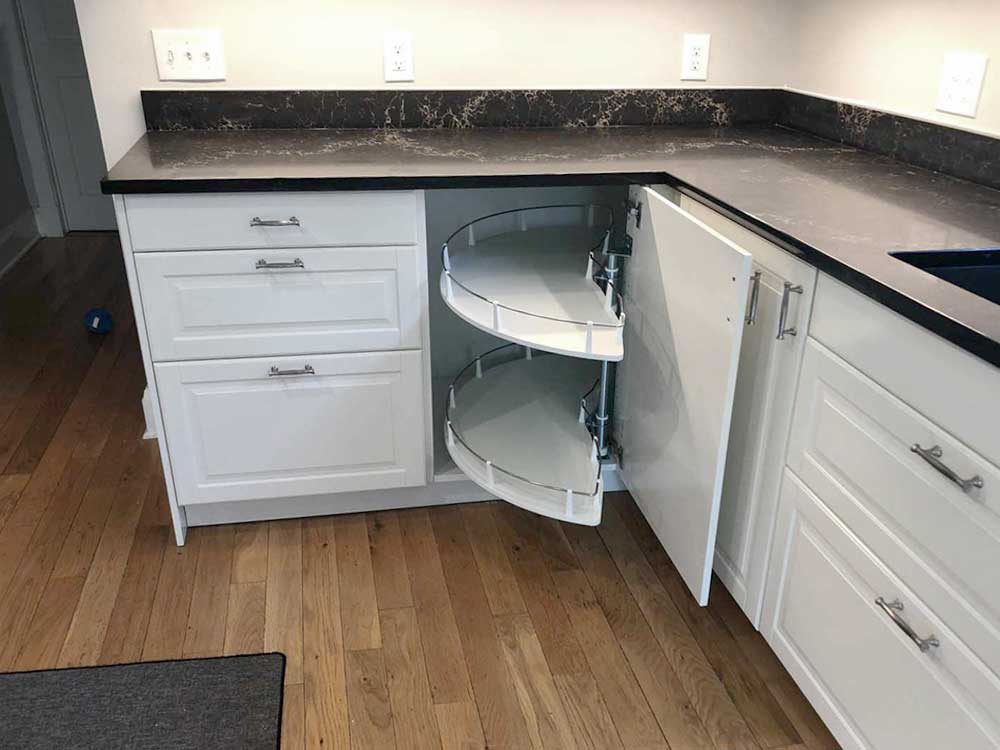
When dealing with a small space, maximizing storage is essential. These are a few ways that Betsy helped Thomas organize his cabinets using IKEA products.
- UTRUSTA corner base cabinet pullout fitting in the base corner cabinet to make the space more accessible.
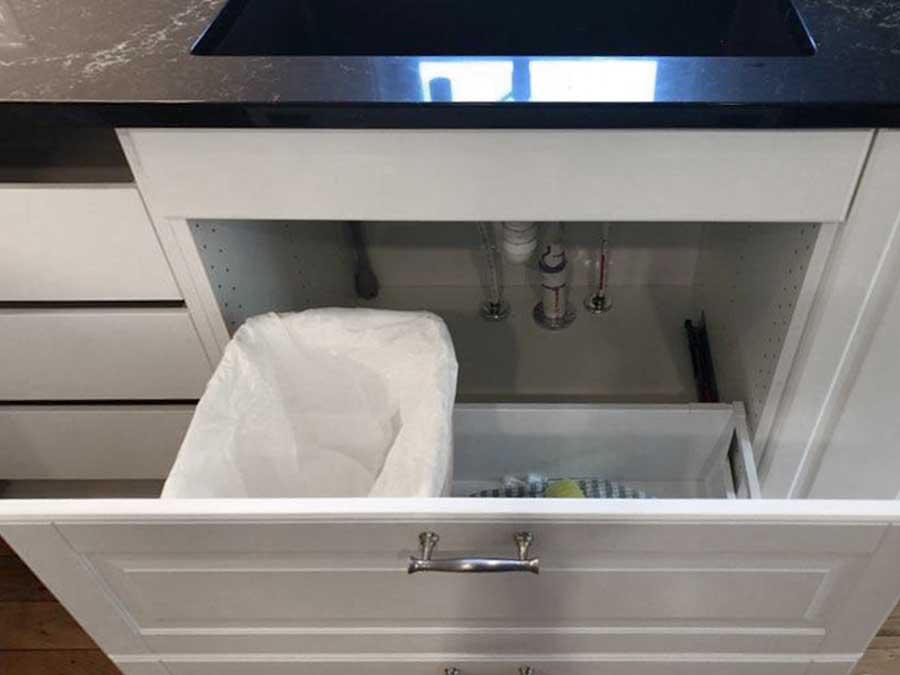
- MAXIMERA drawer to create a pullout trash can beneath the kitchen sink. The drawer has a depth of 17¾” to allow space for plumbing.
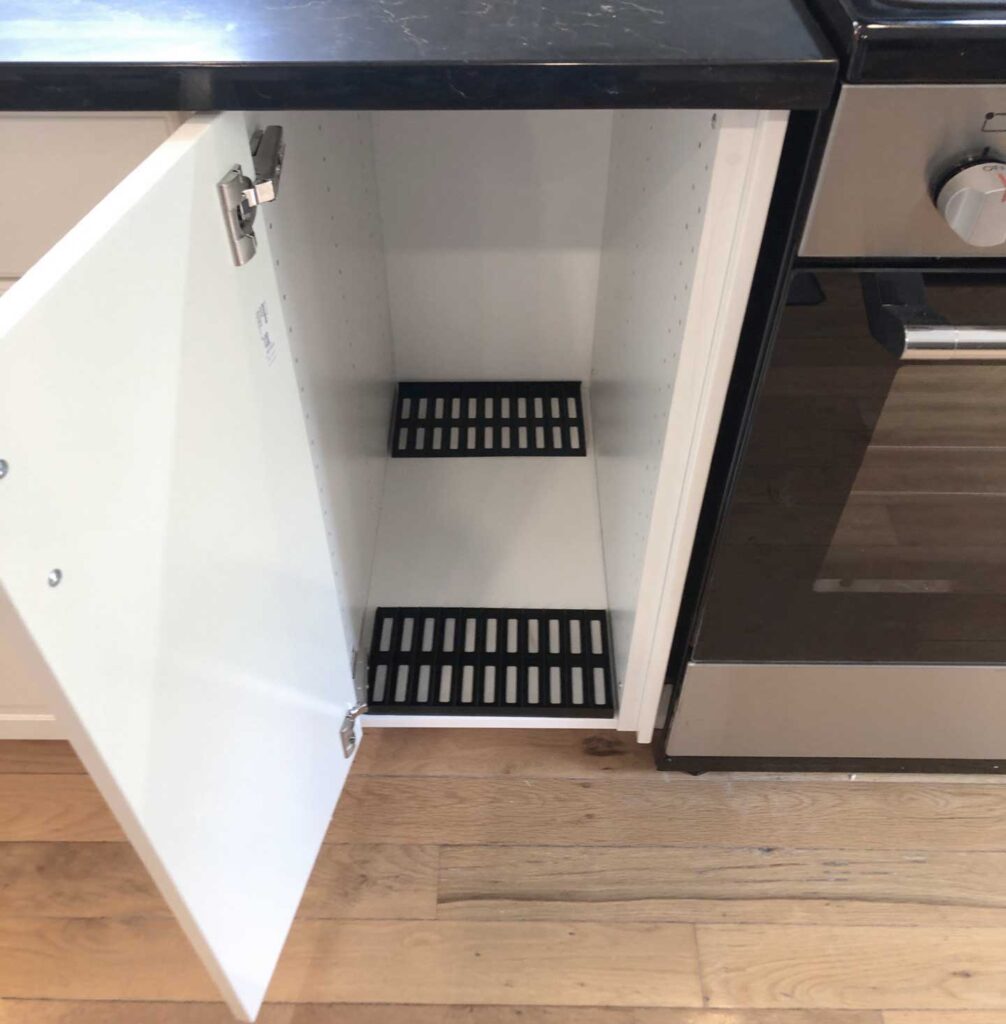
- Innovative baking sheet organizer. This one isn’t technically an IKEA product, but you can ask IKEA for a few of the dividers they use to separate picture frames during shipping. These can be found in the decoration/picture frame area and are the perfect size for separating baking sheets.
When is the Right Time for IKEA Countertop Templating?
Take your time getting your countertop measurements; a lengthy checklist needs to be completed first. Thomas’s countertop guru was kind enough to share the most common mistakes he sees when he gets called out to create a template for IKEA countertops.
Save wasted time (and a trip fee) by ticking the following boxes before calling an IKEA countertop installer.
- Level your cabinets. The base cabinet run must be level within 1/8″.
- Install the SEKTION support rail for the sink. These are often missing, but they’re necessary for countertop template design.
- Move the stove away from the wall. The template creator will need to measure the area behind it.
- Have the sink, stove, and faucet present during templating, or have all the product details identified in the work order. You want to ensure the person doing the cutting knows the size and shape of your countertop fixtures.
- Anything extra that will be mounted to the countertop must be present to identify its location and additional holes. (i.e., instant hot or soap dispensers)
- IKEA cabinets should be properly installed on SEKTION rails. If this isn’t the case, your whole kitchen could come crashing down. This pitfall affects the cabinets’ ability to hold solid quartz and makes it impossible to level the countertop accurately.
- Use four legs on all base cabinets except the corner cabinets, which should have six. Again, this ensures that your cabinets can withstand the weight of a quartz countertop.
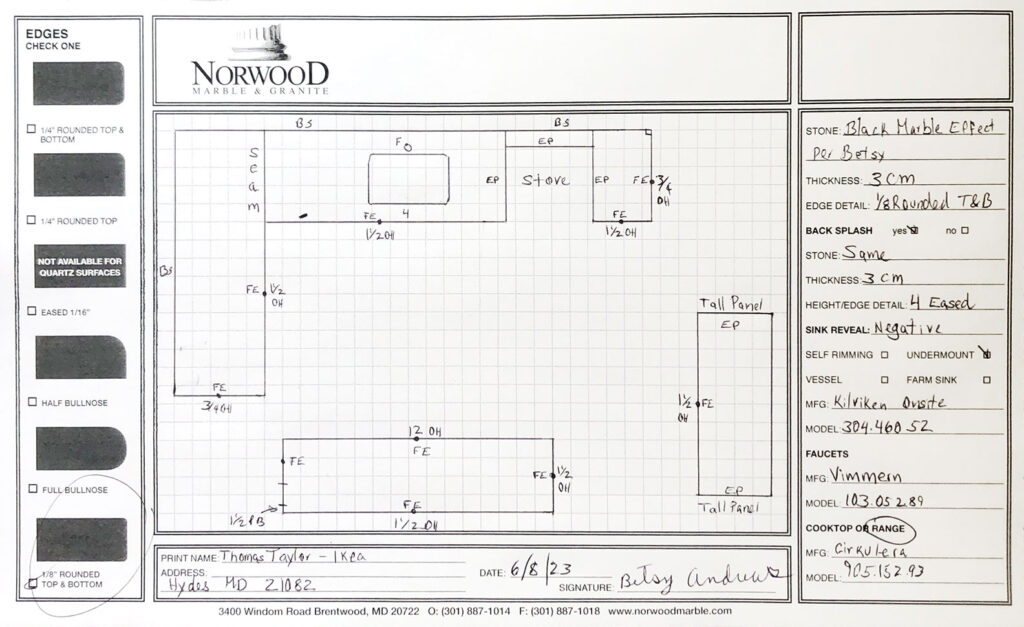
When all is said and done, you’ll have a counter template that looks something like this:
All the Trimmings
The countertop was installed on the cabinets, window seat bench, and half-wall. That left only the plumbing, adding any missing door and drawer fronts and installing trim, toe kicks, and handles.
It sounds like a quick and easy finish, right? But these details often make the most visual impact and can take time to perfect.
Kitchen Cabinet Doors and Drawer Fronts
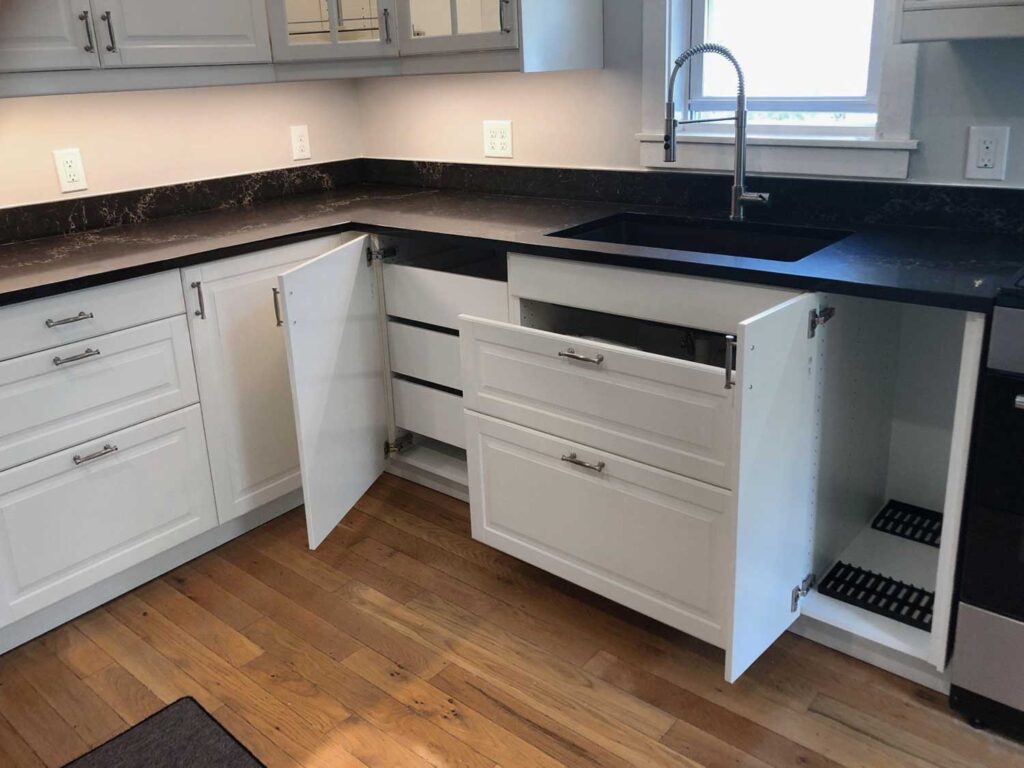
There are a few things to remember when installing BODBYN doors on IKEA cabinets. If you’re installing MAXIMERA drawers within the cabinets, as Thomas did next to his sink, you must remember to install UTRUSTA 153° hinges so that the door swings open to allow the doors to pull out.
Make sure when hanging the cover panels on the exterior of your cabinets that you do not use the holes associated with hinges to fasten the cover panel to the cabinet; otherwise, you won’t be able to mount the door.
Choosing the Right Toe Kicks
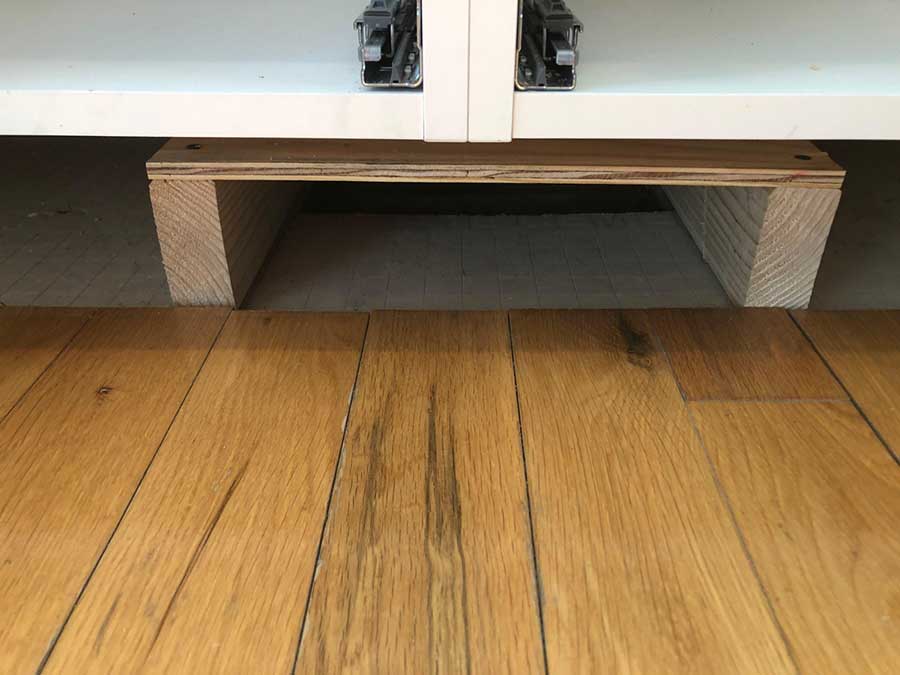
All toe kicks are not created equal. Often, you must consider ventilation, as Thomas’s contractor did beneath the window seat. He built a frame around the heating duct and used a MAKRILLA vented plinth with the toe kick to ensure the air could circulate.
Cabinet Door Handles and Drawer Pulls
One of the perks of using IKEA products with independent designers and contractors is that you aren’t tied to using IKEA products. Thomas used another vendor (Brainerd) for door handles and drawer pulls.
Hole Plugs
Betsy also used VARIERA dots to fill the shelving holes in the glass-front cabinets, ensuring a finished look.
A Successful IKEA BODBYN Kitchen Installation
In just a few months, IKD and a team of IKEA kitchen installation pros transformed this dreary kitchen into a modern room people want to spend time in.
IKD included elements that the IKEA kitchen planner couldn’t, like the bench seat beneath the window, the half-wall seating area, and even a 15″ H cabinet above the microwave. Betsy and Thomas received a floor plan, elevation drawings, a lighting plan, detailed IKEA hacks, and a complete shopping list from IKD, making the design simple for any experienced contractor to execute.
If you have an older home that needs a kitchen makeover, choosing a professional designer makes all the difference.
Get a Professional IKEA Kitchen Design – All Online
Work with our certified kitchen designers to get a personalized kitchen designed around your needs and vision. If you’re interested in learning more about our service, make sure to check out our IKEA Kitchen Design Services.


