Transforming an Outdated Space into a French Country Farmhouse-style IKEA Kitchen – Part 1
A review of how to get unique results for your kitchen by customizing IKEA kitchen cabinets and using a team approach.
In this Article
- Transforming your kitchen with a French Country Farmhouse-style
- How custom cabinets create one-of-a-kind function and style options
- Incorporating clever storage solutions using IKEA cabinet hacks
Revamping with IKEA: A Kitchen Makeover Journey
So you’re an IKEA customer who’s planning to move into a new home to live closer to your kids and grandkids. Before that can happen, you need to renovate your current home which you want to rent out. That, of course, means remodeling the kitchen. (You’ve also never remodeled a kitchen before and plan to do it all yourself. Phew!)
This was the case for Vicki and her husband, from Villa Park, CA, who recently renovated their once dark and inefficient kitchen layout into a bright and inviting French Country Farmhouse-style IKEA kitchen featuring custom cabinets and a slew of unique storage options.
This was crucial as the couple wanted to use every available space for storage including adding a hidden drawer directly under their Bosch 30″ induction cooktop. Also, she wanted the wood of the base cabinets to look like real wood and not laminate. They decided on custom doors.
“We decided on IKEA cabinets due to two factors equally: Quality and price. We chose cabinet door fronts from [third-party custom cabinet front manufacturer] Scherr’s Cabinet and Doors because we wanted a two-tone scheme with the lowers being made of real wood,” Vicki explains.
The Kitchen Design Process with IKD
After doing online research and finding IKD, Vicki and her husband began working with IKD designer Frank to reimagine their space. But don’t be fooled; this was an almost 100% DIY project as the couple only had assistance for the cabinet and crown molding installation. This was purposeful as it not only saved them budget room but also sped up the project so they could move into their new home quicker.
Image 3 alt text: (waiting for image)
The couple spent approximately $19,000 on their cabinets by combining IKEA’s SEKTION kitchen system with the Scherr’s door fronts. They specified that they wanted the wall cabinets to reach the top of the 90″(H) kitchen ceiling. The cabinets are enhanced by Caesarstone white quartz countertops (seen around the 33″ Ruvati undermount sink, on the peninsula island, and around the food prep area).
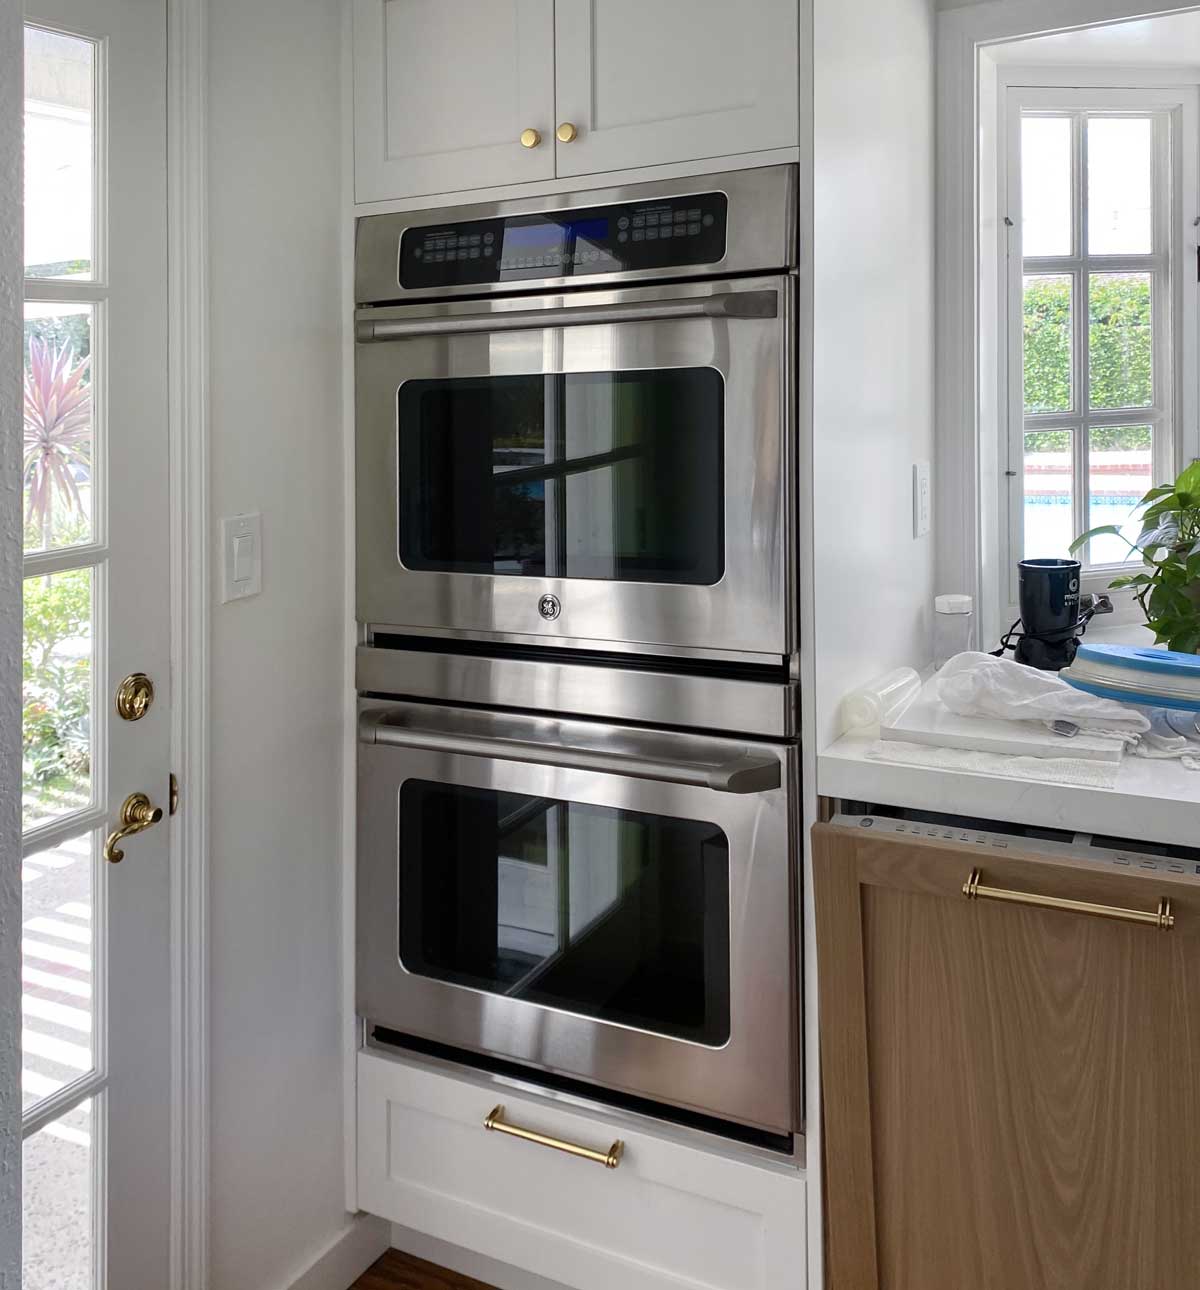
Other items include a Bosch 800 Series 20.5 cu ft 4-door French Door counter-depth smart refrigerator (Model B36CL80ENS/08 purchased at Best Buy); the GE Café Double Oven (kept from their previous kitchen); and IKEA MITTLED LED spotlights in dimmable white, among others.
Vicki says that cabinet installation cost $4,000; the door and drawer fronts (including painting and staining) cost $11,400; cabinet hardware, including pulls and knobs from Rejuvenation ($1,100) and appliances cost $17,000 (including the purchase and installation of a Faber ceiling vent hood, in addition to refrigerator, cooktop, dishwasher, beverage center, sink and faucet). Once the new appliances and other miscellaneous expenses were added, the total cost was about $36,000. To accommodate some of these items and add new storage options, the design also called for IKEA cabinet “hack” modifications.
“We really tried to not spend the amount of money we did on fronts, yet we knew in the end these were the last doors these cabinets would ever see (during our ownership) and we wanted to love them. We had owned this home for over 30 years and we knew we wouldn’t go down this road again,” she says.
Let’s see how Vicki’s IKEA kitchen came together!
Why Design
with IKD?
Why Design with IKD?
Overcoming Space Limitations in a Small Kitchen
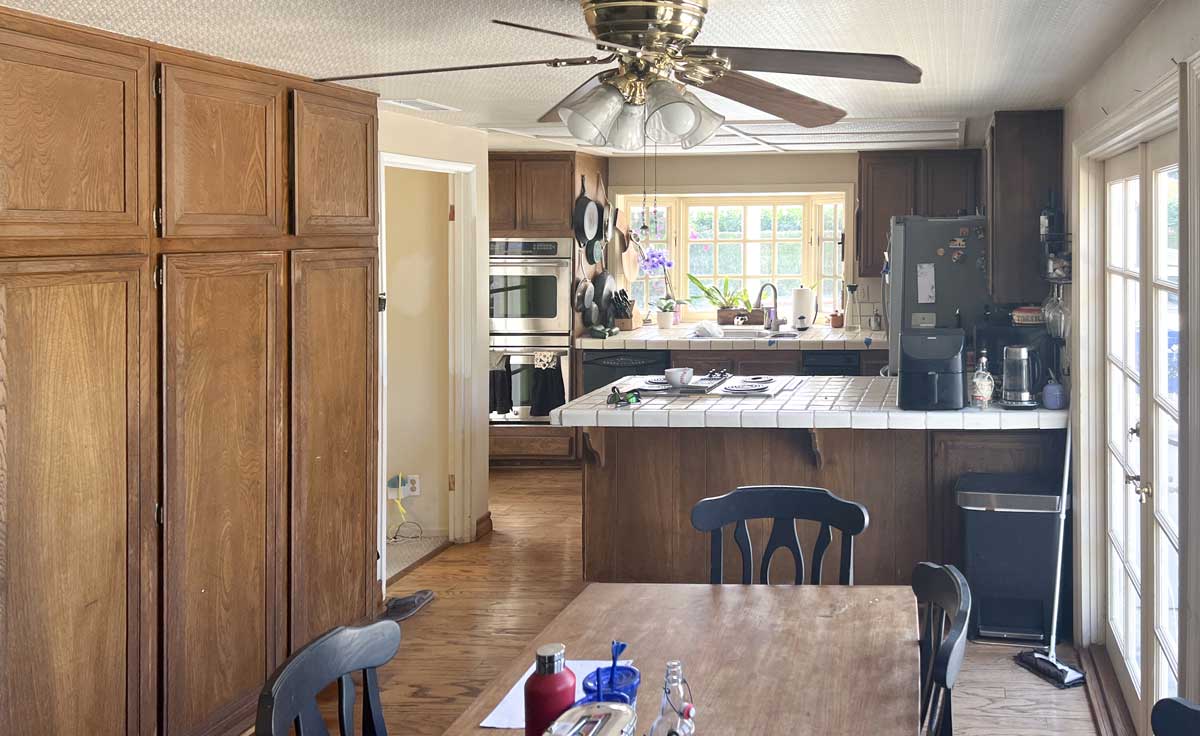
Vicki and her husband’s original kitchen was way too small and unorganized. Even with natural light coming from the window over the sink and from the nearby kitchen door, it was still quite dark and drab.

“We needed space! Our kitchen was small with a peninsula island. We had two very tight corners, and I really don’t like bi-fold doors on corner cabinets so that option was off the table and limited us,” she explains.
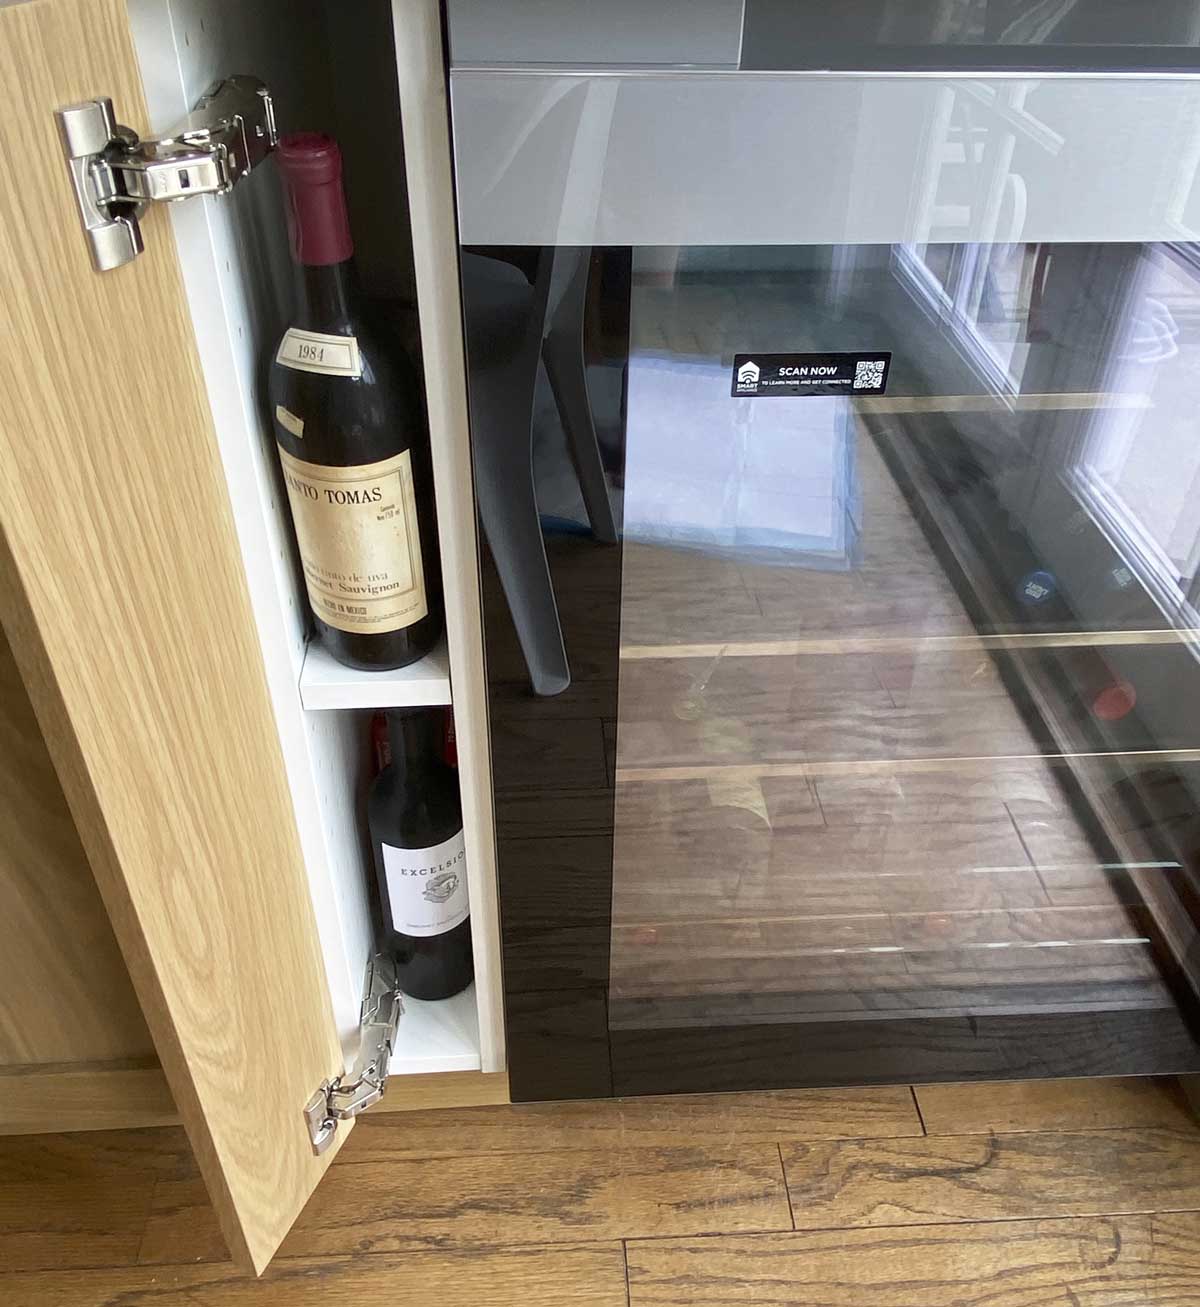
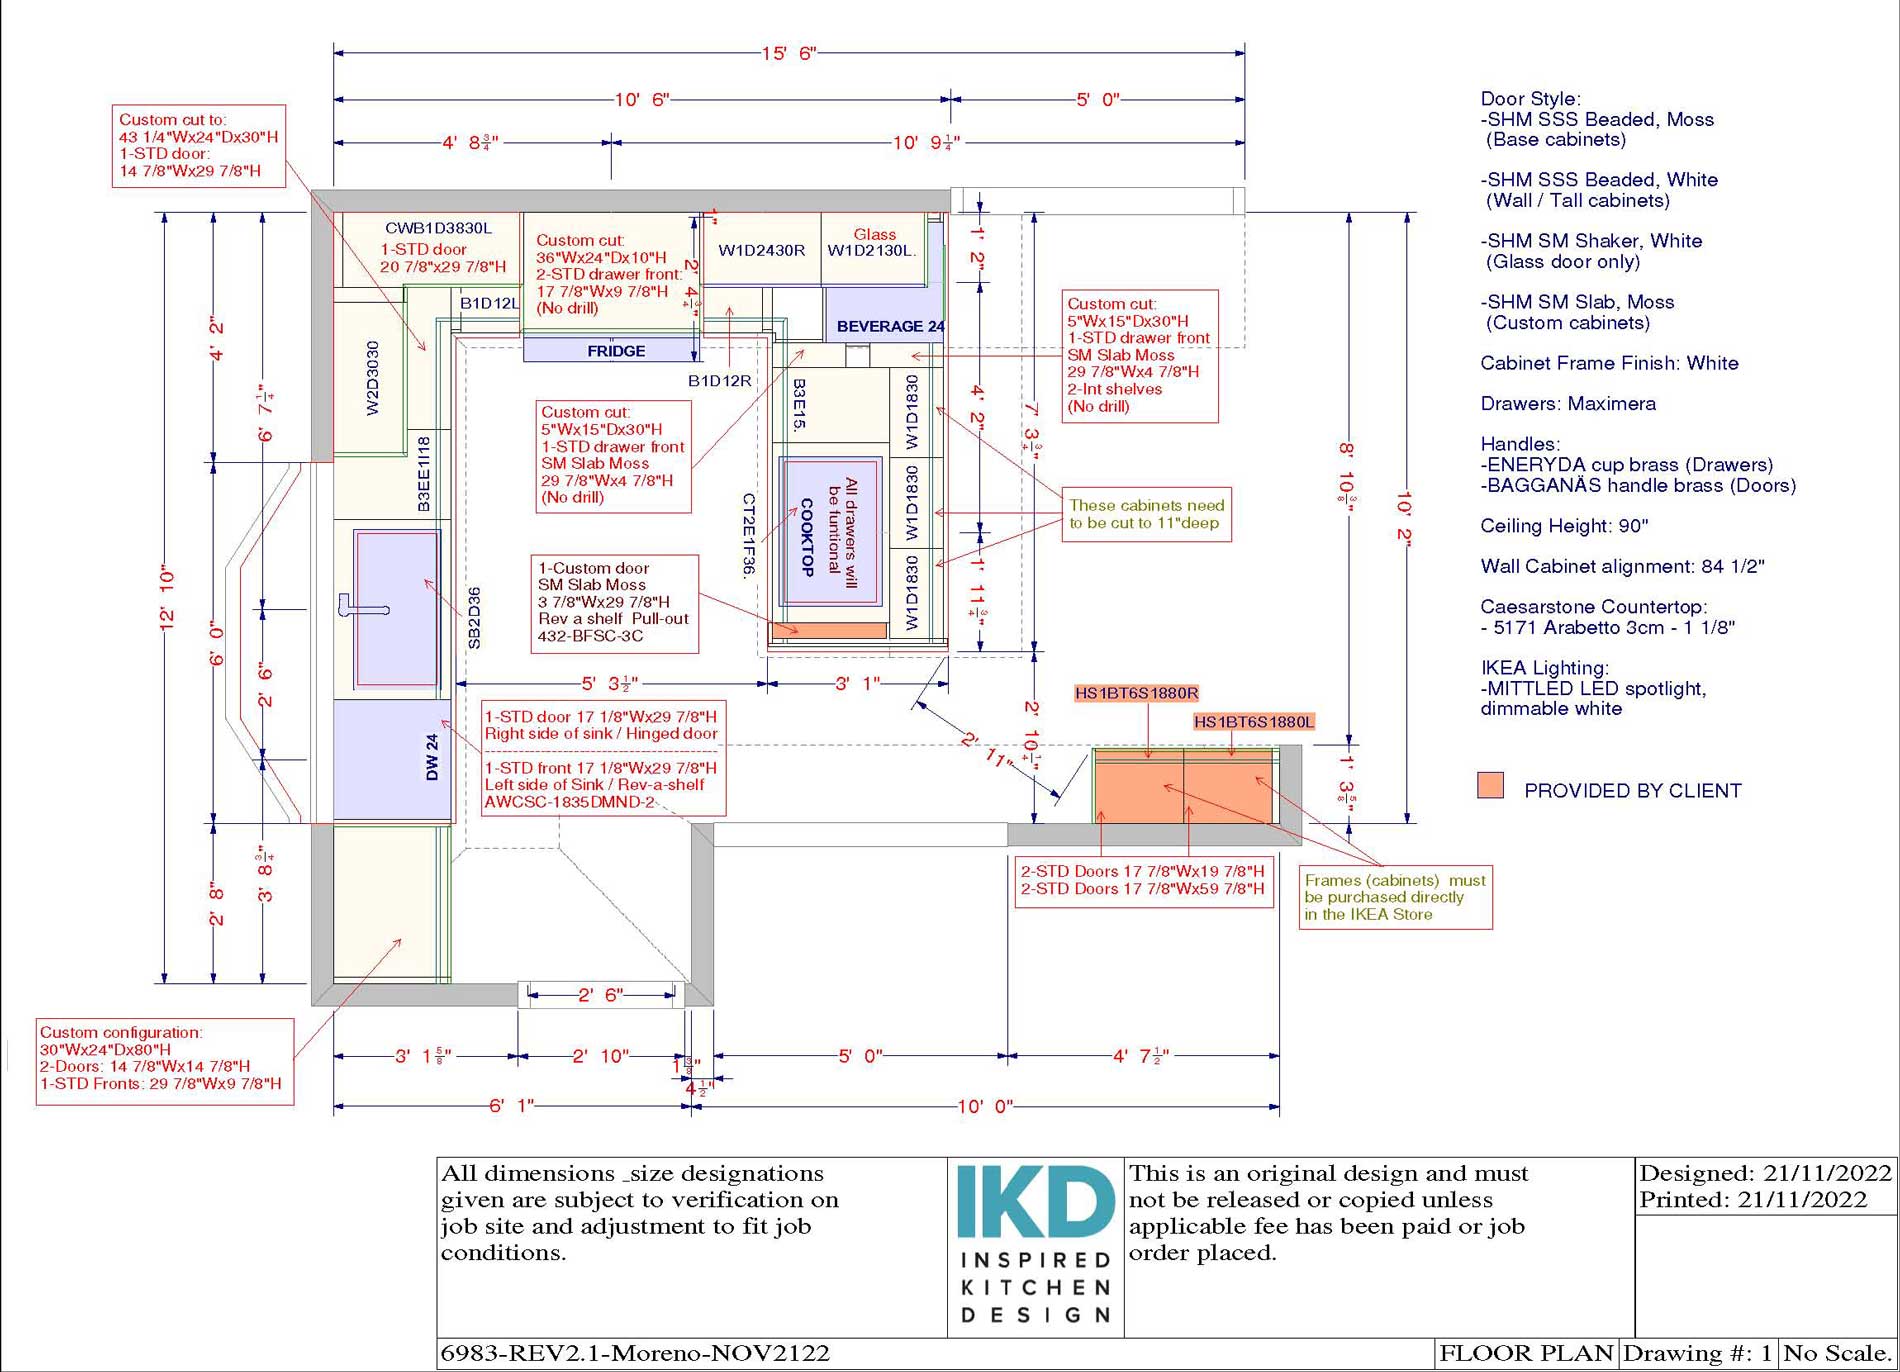
Therefore her main concerns were fitting in as much function as possible. Frank originally had a 5″ filler piece in his design, which Vicki wanted to avoid. So they ended up modifying the width (and depth) of a 12″ base cabinet to a 5″-wide tray storage cabinet and did the same on another cabinet to make a 5″ cabinet for wine bottles next to the beverage center.

Collaboration: The Key to a Successful Kitchen Remodel
Although Vicki intended for this to be a DIY project, she also knew that her kitchen renovation needed expert guidance.
“We chose IKD primarily due to the positive reviews we saw online on HOUZZ and the expert advice we felt this project required. It was our first kitchen remodel so we had a lot to learn,” she says.
As mentioned, they also hired a cabinet installer to install the cabinets and crown molding. However, timing was of the essence and the project began to take extra time.
“If you’re paying someone to install [cabinets], that will definitely eat into the budget and bring the total closer to that of hiring a custom cabinet company. For us, it was a matter of timing. Everything was taking longer than planned and we had bought the other home near the grandkids. Plus we were planning on renting this CA home out,” Vicki notes.
She concludes, “Every month we spent on the kitchen meant another month without the rental income.”
Facing Kitchen Remodel Challenges Head-On
Vicki and her husband made this a DIY project despite never having remodeled a kitchen before.
“We did all the modifications of cabinets ourselves. We modified nine cabinets, and that was extremely time consuming. Height actually was easy, but width and especially depth took much more time,” she explains.
This was even more crucial because they were faced with some significant installation challenges. As Frank notes, one of the biggest challenges was the wall where the sink and double oven are located. The space was limited, with only 32″ available between the wall and the left side of the bay window.
Vicki wanted to use the same GE double oven she already owned, but the oven’s width of 29- ¾” required a panel to cover the unfinished side of the cabinet (plus the 2″ filler used between the double oven tall unit and the wall).
Overall, the cabinet was custom configured to 30″(W) x 24″(D) x 80″(H) along with two Scherr’s doors measuring 14-7/8″(W) x 14-7/8″(H) and one standard front measuring 29-7/8″(W) x 9-7/8″ (H).

Another challenge occurred when the couple removed their old tile counters and realized the counter height had been built up with chicken wire and grout. This created a 1″ difference between the cabinet height and window height.
As Vicki notes, there were a couple of available options; but she did not care for either. She wanted one continuous countertop. So they decided to rebuild the bay window’s inside ledge so it was level with the cabinets.

But another problem was caused by this window issue. They had to use thicker 1″ plywood under the quartz and have their cabinets 5-½” off the floor. She notes that both of those fixes allowed their counter height to be 37″ and meet the bay window.
However, bringing up the cabinets meant the end panel they ordered from Scherr’s would be ½” too short, since it went to the floor. So they added ½” piece of the same stained wood to the top, and placed it under the countertop where it’s not visible.
Note: Check back soon to see Part 2 of this blog about how Vicki’s French Country Farmhouse-style IKEA kitchen was completed!
Get a Professional IKEA Kitchen Design – All Online
Work with our certified kitchen designers to get a personalized kitchen designed around your needs and vision. If you’re interested in learning more about our service, make sure to check out our IKEA Kitchen Design Services.


